About Me

My photo
I'm a colonist who has declared war on machines and intend to conquer them some day. You'll often find me deep in the trenches fighting off bugs and ugly defects in code. When I'm not tappity-tapping at my WMD (also, known as keyboard), you'll find me chatting with friends, reading comics or playing a PC game.

Thursday, August 28, 2014

An InfiniteViewPager for Android

Hey folks!This time around I'm going to be writing a programming post related to my adventures in Android!


Le Problème:

A ViewPager in Android does not support carousel-like scrolling of its items. We can scroll from the first item to the last item but not directly from the last item back to the first item and vice-versa. See the image below to get an idea of what we'd like to achieve.


La Solution:

I've seen several versions of an InfiniteViewPager that present hackish solutions to this problem. Standing on the shoulders of giants, I decided to take a stab at this problem and have finally come up with a non-hackish way of doing things. The basic concept is to truly cycle the fragments in the ViewPager. The Android Studio project has been hosted on github at https://github.com/angelorohit/InfiniteViewPager. Go grab it! Have you got it? OK. What we need are the two JAVA files InfiniteViewPager and InfiniteViewPagerAdapter.

The InfiniteViewPager provides its own OnPageChangeListener. This listener performs circular rotation of the fragments in the ViewPager's adapter whenever a new page is selected. If the user has navigated to the last fragment in the ViewPager, then the first fragment is removed from its position in front and is placed at the back. Similarly, if the user has navigated to the first fragment in the ViewPager, the last fragment is removed from its position at the back and is placed in front.


The InfiniteViewPagerAdapter simply stores a List of Fragments for the InfiniteViewPager.

Contrainte:

Since we are actually cycling between the fragments in the ViewPager, this can only work if there are 3 or more fragments in it. The code has been written such that if the ViewPager has less than 3 fragments in it, no circular cycling is performed, although the user can still swipe back and forth between the existing fragments in the ViewPager.

That's it! Hopefully, someone will find this InfiniteViewPager useful! Happy coding!

Monday, July 29, 2013

Rendering iOS gradients with UIGradientView

Hi folks!

Recently I found the need to render gradients in an iOS app that I've been working on. Now, rendering gradients in a UIView is straight-forward enough. Simply override - (void) drawRect:(CGRect)rect and draw within it using CoreGraphics. This got me thinking. There must be lots of programmers out there who would wish to do the same thing. What if we could come up with something reusable? Without much ado, I give you UIGradientView - A subclass of UIView that supports rendering of gradients.

Here's a breakdown of the concepts used in rendering gradients with UIGradientView.

What is a Gradient Stop?

Let's say we want to vertically transition from White to Red and then from Red to Black. We start with White at the top and transition to red halfway through. Then we go from red at the half position, all the way to black at the bottom. Your mind's eye should have a picture like the one below.

A Gradient Stop has an offset and colour. The offset is the percentage of the position at which the colour is the strongest. For example, in our multiple colour gradient example above, we would need three Gradient stops.
  1. GradientStop with offset 0 and colour White.
  2. GradientStop with offset 50 and colour Red.
  3. GradientStop with offset 100 and colour Black.

What is a Gradient Overlay?

A Gradient overlay represents the overlay of a gradient in a UIGradientView. There can be multiple overlays in a gradient. Each overlay specifies the gradient stops to be rendered. There are two types of gradient overlays; namely, LinearGradientOverlay and RadialGradientOverlay.


LinearGradientOverlay

A LinearGradientOverlay is used to overlay a linear gradient in a UIGradientView. The user of this overlay can specify the direction in which the linear gradient should be rendered. Linear gradients are rendered vertically by default.

typedef enum {
    LinearGradientDirection_Vertical,
    LinearGradientDirection_Horizontal,
    LinearGradientDirection_TopLeftToBottomRight,
    LinearGradientDirection_TopRightToBottomLeft,
    LinearGradientDirection_Max
} LinearGradientDirection;


RadialGradientOverlay

A RadialGradientOverlay is used to overlay a radial gradient in a UIGradientView. Radial gradients are always rendered at the center of the view and are circular. The user of this overlay can specify the radius of the gradient. By default, the radius of the radial gradient will completely fill the view. The radius can also be set to the following enum values:

typedef enum {
    // The rendered radial gradient will completely fill
    // the UIGRadientView
    RadialGradientOverlayOptions_FillOuter = -1,
    
    // The rendered radial gradient will fit the inside
    // of the UIGradientView.
    RadialGradientOverlayOptions_FillInner = -2,
    
    RadialGradientOverlayOptions_Max = -3
} RadialGradientOverlayOptions;

UIGradientView

This gist adds both a radial gradient overlay and a linear gradient overlay to a UIGradientView. By default, the radial gradient will be rendered to fill the view and the linear gradient will be rendered vertically from top to bottom. This is the expected result for the above gradients.


Presets

The project comes with a default set of gradient presets that can be loaded via the UIGradientView(Presets) category class. If you don't wish to use any of the presets, simply exclude the following files from your project:

  • UIGradientView+Presets.h
  • UIGradientView+Presets.m
  • Gradient-Presets.plist.


Feel free to checkout or fork the project from github. Feedback / suggestions are very much welcome!

Monday, October 22, 2012

Game Review : Mark of the Ninja (PC)


Mark of the Ninja, developed by Klei Entertainment and published by Microsoft Studios, is a 2D side scrolling game with a focus on stealth tactics. While there do exist many other games in the same genre, Mark of the Ninja stands out with its innovative game mechanics and alluring art direction. The game was initially released for the XBox 360 and subsequently made its way onto Windows via Steam.

Plot
You play as a Ninja who has been marked by the Hisomu clan with a special ink that grants you access to unique powers and abilities. Unfortunately, these powers come at a price as they will ultimately drive the “marked one” insane. After a western arms corporation slaughter many inhabitants in your ancestral home, the master of the clan orders you to set things right by assassinating the head of the corporation. Throughout the game, your faithful companion Ora, guides you in the ways of the Ninja with helpful hints and tips that always keep the game fast paced and the events flowing. The story features some interesting twists and although you do see the end coming a mile away, that doesn't make it any less epic.

Controls
The controls for the PC version of the game involve using a combination of keyboard and mouse. The keyboard gives you total command over character movement whether it be dodging past lasers, jumping over rooftops or peeking through vents. The mouse allows you to target objects in the environment or perform stealth kills. The latter has an interesting control scheme. When performing a stealth kill, you first sneak up on an unsuspecting enemy and press the left mouse button. The character then goes into strike mode where everything on the screen fades out except for the hunter and his quarry. The on-screen notification then indicates a direction in which the user must swipe the mouse. Swiping in the indicated direction will let the Ninja perform a clean kill. If you swipe in the wrong direction, the execution will be carried out in an unprofessional manner allowing the prey to kick and scream while being gutted. This could attract the attention of nearby enemies.


Performing a stealth kill

Gameplay
Being a Ninja, you naturally adopt the ways of the sword and prefer stealth over direct confrontation. Entering into direct combat usually ends up in you dying because guards can fire bullets while you only have a sword. Every scenario in the game allows you to take down your victims or sneak past them using guile. Your basic tools involve a trusty sword for combat, a grappling hook and an unlimited supply of darts. Apart from these basic tools, you can also equip distraction and attack items. Distraction items let you effectively manipulate your foes by making noise or concealing yourself. Attack items are intended to harm or kill your enemies.

Two interesting notions that play out well in Mark of the Ninja are light and sound. Guards cannot see you in darkness (although dogs can sniff you out!). When you step into the light, however, guards will immediately spot you in their line of sight. This makes for some interesting gameplay as you take out spot lights or navigate around them just so that guards don't see you. Sounds in the game are visually represented as circles. A lot of actions in the game make sound - heavy footsteps, speech, breaking objects or birds. This can be used to your advantage to distract or prepare an ambush for guards as they investigate the source of a noise.

AI
While the AI in Mark of the Ninja certainly isn't bad, it is far from perfect. Guards follow scripted patrol patterns which allow you to time your attacks or steal past them. Enemies seem hardly perturbed when a guard goes missing from his post. Likewise, guards sometimes don't notice when a light goes out, as long as they don't hear or see it happening. While an overly aggressive AI might detract from the gameplay experience, it does make the player find such situations a tad bit odd. This is because the enemy AI is surprisingly good in other areas! Guards become suspicious when they catch a glimpse of you ducking behind cover and dogs start tracking your position once they get a whiff of your scent. There is nothing more satisfying than stringing up an enemy only to watch unsuspecting guards cringe in terror when they chance upon the dead body!

Environment
In Mark of the Ninja, you learn to effectively use the environment to your advantage by concealing yourself in dumpsters, behind pots, or under vents. You can also throw darts at lights or other objects in the environment to distract enemies. The environment isn't always your friend though. Dangerous trip wires, lasers, booby traps and motion sensors force you to watch your step. You can also take down enemies from vantage points or concealed areas.

Graphics
The graphics in Mark of the Ninja are certainly gorgeous. Character art appears to be inspired by Klei’s previous franchise - Shank. Level backdrops span sprawling cityscapes to rainy industrial settings and sandstorm deserts. Jawdropping animations look and play the part too! Interesting cutscenes are interspersed between missions and keep you engrossed in the game. The only minor fault here is that there aren’t enough stealth kill animations. The same animations are particularly noticeable because as a bad-ass Ninja, you’d certainly want to take out every fool that stands in your way!

The environment art delivers a surreal effect to scenes

Score system
The score system in Mark of the Ninja is based on points and seals. Points can be earned per mission depending on your actions. For example, stealth killing enemies give you points and hiding their bodies give you more points. If an enemy spots you and sounds the alarm, you lose points. By reaching a specific score in a mission, you get rewarded with seals.

Skill upgrades and unlockables
There are plenty of hidden secrets in Mark of the Ninja. These come by way of scrolls and artifacts. Scrolls reveal the history of the Hisomu clan in the form of haiku while artifacts simply award you points. Seals can be spent to upgrade your character skills or buy new types of distraction and attack items. New character skills allow you to perform stealth kills with amazing ease and become very handy as the game progresses. The game also features 6 unlockable costumes that you can earn by performing various mission achievements (not related to Steam achievements). These achievements might have you doing things such as “Take out 20 lights” or “Terrorize a guard into shooting another guard”. Each costume features both unique traits and shortfalls.


Verdict
Mark of the Ninja is not a game entirely without shortcomings. The lack of a multiplayer component lessens the engagement time for any player. There is, however, a New Game Plus mode but this doesn’t introduce anything new in the game. That being said, Mark of the Ninja is one of the finest stealth games to be had and playing it will genuinely be a fun-filled experience. The game is available on Steam for 14.99 USD. This is in stark contrast to other 60 dollar games that can give you a much less bang for your buck. So, what are you waiting for? Sheath your sword and shroud yourself in darkness. Become a Ninja!

Do you think this game review was fair? Let me know in the comments!

Tuesday, October 2, 2012

Amateurs and smartphones

Recently a friend of mine picked my thoughts on how mobile phones are changing the landscape of photography. The way I see it, the recent wave of smartphones are indeed redefining the amateur photography scene. So, here go my two cents in a bulleted list:

  • Ease of use
I had bought a Sony DSC TX-10 but I rarely use it because it's more handy to just whip out my phone when that interesting shot presents itself. This is in spite of the fact that the Sony DSC is a portable series of cameras. It's just that my iPhone is more portable.

  • Availability
The mobile smartphone does more than just photos and videos. For that reason, you always have it on you when travelling. Digital cameras may not always be available unless you're going out on a prepared photo session. As an amateur photographer, you'd want to take photos of things like an impromptu group gathering or something interesting you saw on your way to work.

  • Apps
An interesting feature of smartphones is the apps. Apps provide primary-level image editing functionality. With just a few optional tweaks, I can make the colours in an image really pop or I can do something artsy. I can crop, rotate and apply some after-effects as well. An app on my smartphone can never replace Photoshop or LightRoom but there is something to be said for the ability to "spice" up my photos on the go. A great example of a professional photography app is Camera+ for the iPhone.

  • Social features
Another thing that mobile phones have going for them is their ubiquity and a connection to the internet. Almost everyone has a smartphone nowadays and it makes sense that people would want to share these photos with the world. What smartphones allow is simple click-and-share or maybe click-tweak-and-share functionality. There's no lengthy process of copying images to your computer, editing them and then uploading the processed images to your favourite social network. Some services like Instagram have even gone a step further and tied their app to a social network exclusively for mobile photos.

In my humble opinion, smart phones are great if you want to take simple low-res pics on the fly. It would be very hard to take those really awesome shots that we see on shutterstock or in model portfolios with standard smartphones. For example; you'd have to be really pro to manage a bokeh with an iPhone 4S. That being said, future advances in technology may well prove me wrong.

(A couple of photos I took with my iPhone 4S)


Wednesday, August 22, 2012

Git stashing and why it's awesome!

You're halfway through implementing something on a super-awesome project and haven't committed yet. All of a sudden, your manager runs to your desk and informs you of a major bug in the released version of your project. He says, "Hold the presses! Stop whatever you're doing right now and fix the issue on the release branch..." You look at him curiously, wondering if he just had a beer for lunch.

In an SVN world, you'd have to track what files were being modified and export them out to another location. Rather annoying, to say the least, because it defeats the entire point of using a version control system. You could also create a temporary branch, commit your broken changes and then merge that branch with your working branch afterward. An inelegant solution.

However, you're in a Git world, baby! Enter 'git stash'. Stashing allows you to "file away" some or all of your uncommitted changes. Stashes are pushed into a stack and can be popped back later when you want to resume work.

You sit at your desk while pondering the effects of beer after lunch. Then you look down at your terminal and type:

$ git status -s
 M superawesomefile.cpp

Ah! There is one file that you were working on (there could have been more) but you don't want to commit it just yet. You smile shrewdly to yourself and type:

$ git stash save "mysuperawesome changes"
Saved working directory and index state On master: mysuperawesome changes
HEAD is now at b6c8a3f My last superawesome commit message

But wait, are you sure that your changes were stashed? What if they weren't? Paranoia leads you to type:

$ git stash list
stash@{0}: On master: mysuperawesome changes

$ git stash show stash@{0}
 superawesomefile.cpp | 2 +-
 1 file changed, 1 insertion(+), 1 deletion(-)

You list all of your stored stashes with 'git stash list' and then view the files in your stash with 'git stash show'. Sure enough, your superawesomefile is there.

At this point, exuding some major swag, you switch to the release branch and fix the issue with amazing prowess. You then switch back to your working branch and proceed to get back your last stash with:

$ git stash apply
# On branch master
# Changes not staged for commit:
#   (use "git add ..." to update what will be committed)
#   (use "git checkout -- ..." to discard changes in working directory)
#
#       modified:   superawesomefile.cpp

You rise to a standing ovation as the crowd goes wild!

EDIT: My friend, Ananth pointed out that in an SVN world, it is possible to achieve stash-like behavior. You can perform a unified diff and redirect output to a file.
svn diff > /path/to/mysuperawesome_changes.diff

Later, when you switch back to the working branch, your saved changes can be applied back as a patch.
patch -p0 -i /path/to/mysuperawesome_changes.diff

Pretty handy that!

Saturday, March 10, 2012

AGlossBar: A CSS-only progress bar with gloss.


Hey folks,

I think I've learnt enough CSS to be able to make reusable components. I decided to start off with something that I thought would be both fun for me to do and useful for others to use. AGlossBar is a progress bar with a glossy look. The progress bar only requires the use of CSS, no images. The interesting part for me was coming up with a nice way to make the component tweakable by the user without compromising on its glossy appearance. Another hurdle (most likely due to my CSS n00bness) was finding a cross-browser solution. So far, I've only managed to test AGlossBar on the latest stable builds of Chrome, Safari, Firefox and Opera.
The project has been hosted on github at: http://github.com/angelorohit/AGlossBar

If you use AGlossBar for anything, I'd love to know! Feel free to make a post in the comments here or fire an email to angelorohit[at]gmail[dot]com.

Happy CSSing!

Monday, February 13, 2012

Game Review - Shank 2 for PC

The original Shank was a 2D side scrolling beat-em-up released back in 2010. The game was well received by gamers and even grabbed an IGF Game Finalist award. With Shank 2, independent developers Klei Entertainment, had to deliver on the promise of making a better sequel. It was clear that some of the elements reminiscent of the first game had to stay. It was also apparent that many of the quirks and missing features pointed out by the gaming community had to be taken into consideration. Having finished the campaign (on Easy of course), I must say that Klei have indeed managed to make a game worthy of being a successor to Shank.

Controls:
The controls in Shank 2 have been refined and made more PC friendly. Shank (the protagonist) can interact with the environment to a certain degree allowing him to flip switches that set off traps as well as pick up weapons dropped by fallen enemies. Ranged attacks are now much easier to perform and direct with a simple right-mouse click. Standard platforming elements like running, jumping, swinging and throwing have all been brought over from the first Shank. Gameplay is well paced in Shank 2, allowing the player to learn the basics of combat and environment traversal before being pit against anything serious.

Combat:
Combat is part of the core gameplay in Shank. The player has three weapons to use at any given time. A heavy weapon, a ranged weapon and explosives. Apart from these three weapons, Shank also has a normal attack (called his Shank attack). Unlike the first Shank, swapping between weapons is not allowed. This is one tiny feature that I miss because it really does make a difference in a fight. Also, there is no way for the player to guard against attacks, although dodging is possible. Dodging attacks is pretty hard as there is only a split second within which to dodge enemy attacks and god-forbid if there are multiple enemies trying to whack you all at once. I suspect that fewer players will use dodge and will mostly rely on jumping over or away from enemies to avoid incoming attacks.

One of the new moves that I really like in Shank 2 is the counter attack. This move is similar to God of War style moves where the player can quickly do something spectacular when presented with an on-screen notification. In Shank 2, if an enemy is about to attack and has an exclamation mark over his head, the player can perform an insta-kill by pressing a single key. It is also possible to counter-attack some of the boss moves, although this doesn't let you insta-kill them (that would make things too easy, I guess). The good ol' pounce and grab attacks have been carried over from the original Shank. The grab attack does exactly what it says. Shank can grab an enemy standing next to him and then do whatever he feels is fun. Those fun things include slamming the enemy against the ground, firing a shotgun at point-blank range or simply throwing the enemy onto oncoming hostiles. Unlike the first Shank, the player can now also grab bigger enemies and pound the hell out of them! The pounce attack allows Shank to leap over to an enemy some distance away and grab him. This move is especially useful when dealing with enemies that do some sort of ranged attack.

Graphics:
Like the original Shank, violence plays a major role in Shank 2. There are a plethora of ways in which to rain doom upon your enemies like shoving baseball bats down their throats, ripping them apart with a chainsaw or pistol-whipping them. This is definitely a nod to the genre and whole-heartedly embraces every adolescent fantasy that you might have. Gore and explosions are omni-present throughout the game. The original Shank was lauded for its art style and Shank 2 is no slouch either. Shank 2 follows the same 'El Mariachi' look but unlike its predecessor, it certainly plays the part too! Animations are fluid and the visual feedback from performing actions is exquisite. A lot of effort has also gone into the game environment with intriguing detail, weather effects and ‘Desperado’-styled silhouettes. Cutscene animations are interesting, to say the least.

Music:
The music in Shank 2 is simply wonderful. Jason Garner and Vince de Vera have outdone themselves using the nostalgic Shank theme as a set-piece. The music enhances the player’s experience with appropriate tension and action. Voice overs and environmental sound effects are also very effective. With the soundtrack for the first Shank already released, it’s only a matter of time before that of Shank 2 gets out.

Plot:
The original Shank didn’t have much of a story to it and Shank 2 does not attempt to improve things in this area. While the story-telling aspect of Shank 2 is certainly not bad, I felt that a few more questions about Shank’s past could have been answered. The cast of new characters like Corina (the female counter-part to Shank) could have also been fleshed out. The game features Rebel Intel. These are basically pamphlets that describe some of the game characters and their motivations but finding this information is somewhat akin to unlocking secret content by scouring levels. Another tiny peeve of mine is that I felt that the game could have been longer. The first Shank had an equally long campaign and an extra co-op campaign to go with it. The campaign in Shank 2 took a little over 3 hours to complete and left me lingering for more!

Multiplayer:
If the campaign is short, the game certainly makes up for that with an entertaining multiplayer survival mode. Klei Entertainment listened to their fans and went all out in implementing a great co-op aspect to the game which allows you to team up with another player and survive against waves of enemies. The survival mode can be played online or locally (the first Shank had a local only co-op campaign). Rather than bore you with incessant text about how Shank 2’s survival mode works, I’ll just point to this excellent tutorial video after the jump.


Unlockables:
Shank 2 has 16 different costumes to be unlocked by completing various single player and multiplayer objectives. The costumes are not simple re-skins. Each costume has a particular stat bonus associated with it making it crucial to your style of gameplay. For example, if you are more of a ranged attacker rather than an up-close melee brawler, then there’s a costume that will help you do more ranged damage. Shank 2’s Steam achievements also make for great gameplay. Ah, nothing like getting 60 pistol counter-kills, eh?

Verdict:
Shank 2 is high on thrills and will satisfy your thirst for gore. The single player campaign offers an entertaining but short experience. If you have a friend to play with online, then there’s loads more fun to be had in the survival mode! The game is currently priced at 9.99 USD (approx. 500 Indian Rupees) on Steam. Shank 2 is also available on Origin for PC, XBox and PS3. Grab the game from it's Steam page here!

Do you think this game review was fair? Please let me know in the comments!

Thursday, February 2, 2012

Lazy Programming

I am a slightly lazy programmer. There I said it! This doesn't necessarily mean that it's a bad thing to be lazy... Lazy programmers try to avoid doing grunt work. They are the ones who will write that tiny tool or that simple script just so they can get out of having to do a repetitive task. Those same utilities will end up being used by others and will in the long run boost productivity!

"So, is it good to be lazy?" - one might ask. The answer is - "It entirely depends...". You see, a lazy programmer can also be that fellow most people find uncooperative in a team. He might want to spend two whole days (at crunch time!) writing a script that would save him a few hours of continuous grunt work. If a lazy programmer is forced into a position where automating a task is quite infeasible, then BEWARE! The programmer will now unleash the beast within - moaning, groaning and cursing all the way through to task completion. Another area where lazy programmers don't fit in, is when they are called upon to debug someone else's code. Most programmers hate this part of the job but lazy programmers hate it even more! They will naturally point out flaws in the code architecture (ritually quoting design patterns that should have been used).

However, there is one very important thing that lazy programmers love to do! Lazy programmers love to design code. Give them a chance to do so and they will build you a very flexible and generic system (covering lots and lots of use-cases). The same system could be taken and simply "plugged" into other projects with similar requirements! Lazy programmers also tend to write very elegant code with fewer bugs by virtue of the fact that they encourage re-usability.

At the end of the day, Lazy programmers are bad soldiers but good Generals. Are you a lazy programmer? Let me know what you think constitutes a lazy programmer in the comments.

Happy (lazy) coding!

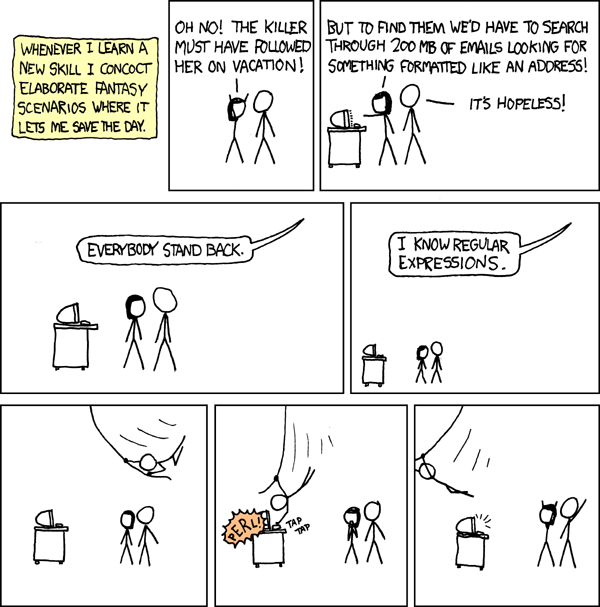
(Above comic, courtesy of http://xkcd.com)

Thursday, January 5, 2012

Create an icy glass silhouette with Gimp.

Hey folks!

I came up with a nice effect which I thought was really worth sharing. Refer to the following image for a clear picture (pun intended) of what we are trying to achieve.
Note that I am using Gimp 2.6.1 on Windows. Gimp is free software and can be downloaded from www.gimp.org. Since I don't want to end up with an extremely long-winded post, I'll just assume that you can find your way around Gimp. If you do find yourself stuck at some point, feel free to comment on this post and I will gladly help you along.

Step 1: Begin with an empty canvas size of 640 x 480.

Step 2: Set the foreground color palette to the following shade of Blue - 80c0ff and bucket fill the background layer.

Step 3: Create a new background layer and name it 'Noise'. Bucket fill this layer with the following shade of Blue: 386597.

Step 4: Go to Filters->Noise->Hurl and use the settings in the image below.


Step 5: Go to Filters->Blur->Gaussian Blur and apply horizontal and vertical blur radius of 25.

Step 6: Set the opacity of the Noise layer to 70 and the blend mode to Value. Your image at this point should look similar to this.


Step 7. Now, create a new layer with a white background. Go to Filters->Noise->RGB Noise and use settings of 0.2 for Red, 0.2 for Green, 0.2 for Blue and 0.0 for Alpha.

Step 8: Set the opacity of the White layer to 30 and the blend mode to Grain Extract.

Step 9: Create a new transparent layer on top. Name it 'Silhouette'.

Step 10: Set the foreground color to full white and paint haphazardly inside this layer. See the picture below for the kind of painting you should do.


A real piece of art, huh? You don't need to precisely follow this painting but try to concentrate on the center of the picture since that is where we will ultimately end up placing our silhouette.

Step 11: Gaussian blur the layer with horizontal and vertical blur radius of 100. Change the blend mode of the layer to Value. Your image should now look similar to this.


Step 12: Now, its time for us to put in our silhouette! Make a heart shaped cut-out in the center of the 'Silhouette' layer. You can easily make the top part of the heart with two circles and then use the free select tool for the bottom portion of the heart. Then just delete the area within the selection. Alternatively, you can use the eraser tool and erase in the shape of a heart. No need to be totally meticulous about the shape of the silhouette since we will be blurring it anyway. I've chosen to go with the selection method and if you did the same, you should end up with an image similar to the one below.


Step 13: Select the entire 'Silhouette' layer (Ctrl + A) and Gaussian Blur it with horizontal and vertical radius of 30.

Step 14: There is no Step 15!

Here is another variant of the effect. I just played with the colors, opacities and of course did a completely new silhouette.

Enjoy!

Saturday, December 31, 2011

Create a simple vintage photo effect with Gimp

Hey folks!

Sometimes you might want to take a recent photo and make it look like it was taken with a vintage camera. Here's one easy way to do this. Note that the image processing software that I am using here is Gimp 2.6.1. Gimp is free software and can be downloaded from http://www.gimp.org/

Alright, just to give you guys a feel of what we're trying to accomplish, here are before and after shots of a photo that I took when visiting the Chinese Gardens in Singapore.

Before:


After:


Step 1: Open the image of your choice in Gimp.

Step 2: Duplicate the image layer one time. You can duplicate a layer by clicking on the duplicate button at the bottom of the layers panel window or pressing Shift + Ctrl + D (in Windows).

Step 3: With the new layer selected, go to Colors->Desaturate. Pick 'Luminosity' among the options presented and then click OK. Your image should now look Black and White.

Step 4: Change the blend mode of the Black and White Layer to 'Overlay'. The blend mode can be changed from the drop-down menu at the top of the Layers panel.


Step 5: Change the foreground color to the following shade of Yellow: fbf2a3

Step 6: Go to Layer->New Layer (or press Shift + Ctrl + N). Among the Layer Fill type options, select 'Foreground color'. Leave everything else as is and click OK.

Step 7: Change the blend mode of the new layer to 'Multiply' and set its Opacity to 60. Your image should now have a yellowish tinge.

Step 8: Change the foreground color to the following shade of Magenta: e865b3. Once again, add a new layer with Layer Fill type as 'Foreground color'. Change the blend mode of the new layer to 'Screen' and set its Opacity to 20.

Step 9: Change the foreground color to the following shade of Blue: 0949e9. Again, add a new layer with Layer Fill type as 'Foreground color'. Change the blend mode of the new layer to 'Screen' and set its Opacity to 17.

Step 10: That's it! We're done. You may tweak the opacities of the Yellow, Magenta and Blue layers to make your particular image seem more authentic.

Enjoy!

Friday, December 30, 2011

Light Snake for HTML5!


I have had the good fortune to explore a bit of HTML5, an emerging web standard that is poised to take the online world by storm. The technology isn't quite there yet. Current browser vendors offer differing or incomplete implementations of the standard and it's a bit of a pain to ensure that whatever you write works generically. Still, this is one of those lemons that bears watching...

The first thing that crossed my mind was to port LightSnake. Its a simple and fun game of snake and requires very minimal player input. And so, I did manage to port the game from C++ to Javascript and get it running acceptably well on most of the major browsers. One notable exception is that dinosaur of all browsers, the one that exists simply to torment all web-developers. Yes, Internet Explorer!

The project has been hosted on Google App Engine and can be accessed from the following URL: lightsnakegame.appspot.com (I wanted to get the app name 'lightsnake', but someone seems to be squatting on it).

Enjoy!
EDIT: The source of the project can be forked on github at: http://github.com/angelorohit/lightsnake

Wednesday, November 9, 2011

Light Snake

While listening to some really cool music on soundcloud, an image of the old-school Snake game popped up in my head. A game of Snake with neon lights. So, I thought to myself - "Heck, I should make this!" And so I did...


Needless to say, I didn't sleep that night.

Want to play? Get it from:

Thursday, October 27, 2011

How to erase specific elements from an STL container - the C++ way.

STL iterators are tricky little fellows. One moment they act clean and the very next, they throw their hands up and say something cryptic. Consider this snippet that erases all elements whose values are 20 from a vector of integers.

typedef std::vector<int> IntVectorType;
IntVectorType vInt;

for(IntVectorType::const_iterator iter = vInt.begin();
iter != vInt.end(); ++iter)
{
if( *iter == 20 )
{
vInt.erase(iter);
}
}

Lo and behold! The program crashes! This is because when you erase an element from a container all iterators to its position are invalidated. This just happens to be our loop iterator. So, what is an innocent programmer to do?

Well, there are two ways to erase individual elements in an STL container.

Method 1: The crude way ( recommended for cavemen/barbarians/C -programmers ;) )

IntVectorType::iterator iter = vInt.begin();
while(iter != vInt.end())
{
if( *iter == 20 )
{
iter = vInt.erase(iter); // Get iterator to next element.
}
else
{
++iter; // Increment if not erased.
}
}

The method vector::erase() returns an iterator to the element that subsequently follows the last element that was erased. So, we just use that iterator to continue looping. Good! Problem solved! Is there a better way?

Method 2: The modern C++ way (recommended for rockstars/you/me)

struct EraseFromVector
{
// Functor
bool operator ()(const int value) const
{
return (value == 20);
}
};

vInt.erase(std::remove_if(vInt.begin(), vInt.end(), EraseFromVector()), vInt.end());


Looks like g(r)eek, you say? Alright then, let me explain. Basically, std::remove_if() is a magical chap. He takes two iterators as a range within which to work. For each element within that range, he then checks the unary predicate(our third argument) to see whether the element should be removed or not. If the predicate returns true, the element is removed.

I did say "removed" but in actuality, remove_if() sends the doomed elements to the back of the container. He doesn't actually remove them. How could he? He doesn't know what kind of container he's working with. Only the container can remove elements.

The nice thing about remove_if() is that he is guaranteed by the standard to preserve the order of the elements that were not removed. So, if our vector contained the elements 10, 20, 30, 20, 40 in that order, it will now contain the elements 10, 30, 40, 20, 20.

Finally, remove_if() returns an iterator to the start of the sequence containing all those miserable elements just sitting there at the back waiting for the axe to fall. We pass this iterator as the first argument to vector::erase() and an iterator to the end of the vector as the second argument. In one full swoop, all elements in the range are erased.

Now, doesn't this seem a lot more fun than a boring old while loop? :)

Saturday, October 8, 2011

R.I.P Steve Jobs

At first, the world saw him as nothing more than a nerd, a high school drop out, a rebellious kid. Then the world saw him as a geek, a competitor, an irrational human. Being fired from Apple was the best thing that could have happened because that's what made him a real entrepreneur.

A man who looked at the potential in smaller companies and brought out the best in them. He believed in beauty and elegance in computers unlike the rest of the world. The world resisted his ideology but never killed it.

He returned and changed the music industry for the better. He went through a near-death experience. He beat it, came back and changed the entire way we perceived a digital world with the release of the iPhone. Now, the world sees him in a different light - Visionary, Creator, Future Technologist.

Requiem De Pace - Steve Jobs. You will sorely be missed.

Thursday, September 8, 2011

ACSVParser: A simple CSV parser written in standard C++.

Hey folks,
Its been a while since I posted back here... ok, its been a looong while. A lot has been going on. I've pushed forth my career in gaming all the way to Singapore! Yes, that's one of the four asian tigers and it sure is one of the best places to be working as a game developer. That, of course, does not mean I will let this blog lie fallow. So here goes...

One of the most interesting (vexing?) things about programming is that some of the simplest things turn out to be not so simple at all! Consider a CSV reader. We've probably used one (if not written one of our own) and yet we all know that it could do with a whole lot of customization. Some of the general peeves, I've heard are:
"I don't want to use commas, I like using the caret symbol!"
"Why can't I have new lines in my CSV content?"
"I want to have embedded spaces in my CSV data!"
"I want to sneeze with my eyes open, darn it!"

All of these (except the last one), led me to stop kicking the can down the road and come up with my own parser. I called it ACSVParser(after yours truly :))

The project is hosted on github at https://github.com/angelorohit/ACSVParser
Do check it out and let me know what you think (feedback, suggestions, issues).

Cheers!

Friday, May 20, 2011

Poem - The Warning

While going through an old diary of mine, I happened to stumble upon a poem I'd written in high school. It made me remember that I did want to be a writer before I became a programmer. Perhaps someday, I'll be able to do both.


The Warning

Spare me your protests for peace and love,
You do nothing but put on a lively show…
For then you disbelieve the one above,
And meekly forsake the man next door.

If autumn leaves were to fall in spring time,
Or Snowy flakes were to cover a summer street,
You would still call this poem a crime,
You would still throw tantrums and stamp your feet.

Your hunger-strikes won’t get what you want,
This isn’t the way the battle should be won,
I see starved looks on faces gaunt,
But is what you demand inevitably done?

The bomb blasts you decry aren’t one of a kind,
Hold on a bit and press rewind,
This happened before but you didn’t mind,
Now why would you get that petition signed?

Please don’t belittle this poem of mine,
I’d really appreciate it if you spent the time,
To work through each and every line,
You’ll see there’s always a reason and rhyme.

Friday, December 31, 2010

Happy New Year!

Happy 2011 everyone! Have a wonderful year ahead!

" Ring out the old, ring in the new,
Ring, happy bells, across the snow;
The year is going, let him go;
Ring out the false, ring in the true. "
~ Alfred Tennyson, 1850

(1600 x 1200 Designed with Gimp 2.6.1)


Friday, September 24, 2010

Game Review: NinJump for the iPhone.

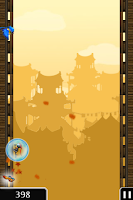
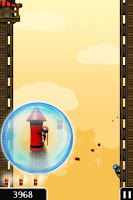
NinJump from Backflip Studios is one of those games that captures your attention from the get go due to its lovely visuals and simple gameplay. Our protagonist is a Ninja with an uncanny ability to defy gravity and run up walls. Of course, being a Ninja you also get to deal with all manner of enemies ranging from cute little twitter blue birds, squirrels and rival clan Ninjas. Your wall-running quest ends when an enemy manages to tag you. Gameplay goes in short bursts hardly lasting more than 5 minutes at a stretch before you run into an enemy and lose. The game is free to download from the AppStore but includes ads. If you find the ads particularly annoying, you can disable them via an In-App purchase.

Basic Mechanics:
There are two walls on either side of the screen held in portrait mode and you can bound from wall to wall by simply tapping the screen. When jumping from one wall to the other, the Ninja does a slicing action with his Katana (sword), rending anything that gets in his way. Timing is key. The jumps must be timed so that you slice through your enemies. If you knock into an enemy while running up the wall, its game over.

Power-ups:
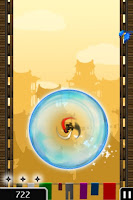
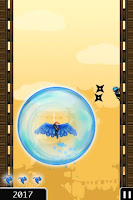
The game isn't as bland as a simple run and slash. There are god-awesome powers too! If you manage to kill three enemies of the same type one after the other, you gain a power-boost that is specific to the enemy that was killed. For instance, if you manage to kill three blue birds in a row, the character will sprout wings and take to the air, smiting anything that gets in his way. After a short while, the power will end and you will become your usual vulnerable self again. The power-ups are particularly visually appealing and when you see them for the first time, you are bound to go "Oh YEAH!" (or some such similar form of exclamation).

There are also tiny bubbles on the walls which you can grab to get a protective force-shield. The force-shield is good for one hit.

Score System:
The score you accumulate is a factor of the distance you've covered. This is naturally dependent on how long you manage to survive and how many power-boosts you gain. Destroying attackers is great fun but unfortunately, it doesn't contribute to your score.

The Good:
- Good replay value.
- Cute visuals.
- Addicting gameplay.
- FREE!

The Bad:
- Really simple (can be seen as a good thing too)
- Needs more bad guys.
- Needs a better scoring system.
- No unlockables? :(

Get NinJump on the AppStore here.


Saturday, July 10, 2010

iDream wallpaper done with the Gimp

I did a nice wallpaper while listening to some cool House/Trance music and this is what I ended up with. Enjoy!

(1440 x 900 widescreen)


(1600 x 1200)

Saturday, June 19, 2010

Game review: Prince of Persia - The Forgotten Sands for the PSP

After the Prince of Persia trilogy that became a cult hit among gamers around the world, UbiSoft announced their departure from the current Prince storyline and their venture into a new cel-shaded version of the game. However, before leaving things out to dry, the publishers of the game decided that they would do a fourth title in the POP series – The Forgotten Sands. Prince of Persia: The Forgotten Sands was developed and released for multiple consoles including the Xbox, PS3, Nintendo Wii, DS and the PSP.

The Forgotten Sands is another epic adventure of the prince that takes place between the events of The Sands of Time and The Warrior Within. What’s really interesting is that the game for the PSP is not just another watered-down story of the one that exists on larger consoles. This time around, the creators decided that handheld owners warranted a unique experience for the Prince and as such the entire storyline is radically different from the one for the Xbox, PS3 and Wii.

THE PLOT:
The plot begins with a prophecy foretold to Ahihud, the mightiest of fire spirits - “You will die by the blade he brings. As sure as winter follows fall and day turns to night, a lonely hero with the blood of kings, no mortal soul can withstand his might”. Fearing that the prophecy would come to pass, Ahihud sends his minions to hunt down and kill all those with royal blood. King Sharaman, the Prince's father locks him in the palace for his own safety but the Prince pursues a mysterious guiding light which offers to help him find his enemy. The light turns out to be Helem, a spirit of time.

GAMEPLAY:
Ubisoft have taken the PSP game back to its roots by producing a 2.5D platformer(remember the classic Prince of Persia you used to play on DOS?) . The Forgotten Sands is in fact three-dimensional but not free roaming as you would expect in a 3D world. With the help of the spirit of time, the Prince can either accelerate time or slow it down. This makes for some pretty interesting gameplay and inventive puzzle solving. You can make a tiny sandstorm launch the Prince into the air by accelerating it or solidify by slowing it down. Time manipulation is not restricted to sands alone. Any object that Helem hovers over may be subject to acceleration or deceleration. Enemies can be slowed down to a crawl for a short while so that you can quickly dispatch them. Traps can also be brought to a grinding halt for you to safely get past them. As you run through the game, you find glowing orbs of magic called Elixir. Collecting these allow you to purchase upgrades for the Prince. The upgrades are either combat improvements (new combos) or health improvements (extending the health bar for longer life). The good old drinking fountain is still in use as it serves as a checkpoint for the game.

COMBAT:
Combat is pretty simplistic in The Forgotten Sands. Basic combat involves mashing the square button to hit enemies. You can use the circle button to dodge or throw enemies into the air. You can also use combos in combat once you’ve unlocked them using collected elixir. Most of Ahihud’s minions are pretty easy to take down and don’t really pose a threat. Bosses, however, can be a different story.

GRAPHICS AND ENVIRONMENT:
Although, the graphics of the game cannot compete with that of larger consoles, It still looks marvellous on the PSP. The artists have paid attention to minor details such as wind being swept in the desert or tiny particles pulsing in a magic world. The cutscenes are engrossing and there’s nothing more rewarding than watching a brand new cutscene of the game after clearing a particularly irksome level. The environment is truly exotic giving you a “wish I were there” feel. Crumbling platforms are common especially in the later levels where you are engaged in a mad rush to clear the level without stopping even for a moment’s breath!

MUSIC:
The soundtrack of the game keeps you right in the thick of it, from the arabic-inspired scores to the dark overtones of danger. Voice acting is spectacular as the story unravels through conversations between the Prince and Helem.

VERDICT:
Fans of the POP Franchise would surely want this game since the story is completely different from the other console versions. The game offers some replay value too by allowing replaying of levels to better your time or collect elixir.