Hey folks!
I came up with a nice effect which I thought was really worth sharing. Refer to the following image for a clear picture (pun intended) of what we are trying to achieve.

Note that I am using Gimp 2.6.1 on Windows. Gimp is free software and can be downloaded from www.gimp.org. Since I don't want to end up with an extremely long-winded post, I'll just assume that you can find your way around Gimp. If you do find yourself stuck at some point, feel free to comment on this post and I will gladly help you along.
Step 1: Begin with an empty canvas size of 640 x 480.
Step 2: Set the foreground color palette to the following shade of Blue - 80c0ff and bucket fill the background layer.
Step 3: Create a new background layer and name it 'Noise'. Bucket fill this layer with the following shade of Blue: 386597.
Step 4: Go to Filters->Noise->Hurl and use the settings in the image below.

Step 5: Go to Filters->Blur->Gaussian Blur and apply horizontal and vertical blur radius of 25.
Step 6: Set the opacity of the Noise layer to 70 and the blend mode to Value. Your image at this point should look similar to this.

Step 7. Now, create a new layer with a white background. Go to Filters->Noise->RGB Noise and use settings of 0.2 for Red, 0.2 for Green, 0.2 for Blue and 0.0 for Alpha.
Step 8: Set the opacity of the White layer to 30 and the blend mode to Grain Extract.
Step 9: Create a new transparent layer on top. Name it 'Silhouette'.
Step 10: Set the foreground color to full white and paint haphazardly inside this layer. See the picture below for the kind of painting you should do.
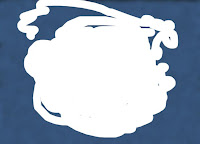
A real piece of art, huh? You don't need to precisely follow this painting but try to concentrate on the center of the picture since that is where we will ultimately end up placing our silhouette.
Step 11: Gaussian blur the layer with horizontal and vertical blur radius of 100. Change the blend mode of the layer to Value. Your image should now look similar to this.

Step 12: Now, its time for us to put in our silhouette! Make a heart shaped cut-out in the center of the 'Silhouette' layer. You can easily make the top part of the heart with two circles and then use the free select tool for the bottom portion of the heart. Then just delete the area within the selection. Alternatively, you can use the eraser tool and erase in the shape of a heart. No need to be totally meticulous about the shape of the silhouette since we will be blurring it anyway. I've chosen to go with the selection method and if you did the same, you should end up with an image similar to the one below.

Step 13: Select the entire 'Silhouette' layer (Ctrl + A) and Gaussian Blur it with horizontal and vertical radius of 30.
Step 14: There is no Step 15!
Here is another variant of the effect. I just played with the colors, opacities and of course did a completely new silhouette.
 Enjoy!